Flying with a Trapeze
- NYGH
- Apr 17, 2022
- 3 min read
Sally Eyring's talk on Loom Interventions kicked off a discussion on making a homemade trapeze. Four guild members share their solutions. Inspired? Send your photos to nygh.info@gmail.com and add to the discussion.

Susan Mayo's Gliding Trapeze This photo shows a warp extending from the back of my Louet compu-dobby loom up and over the front, across a gap to a Baby Wolf loom. The warp is placed around the top of the Baby Wolf and hangs down. I placed weights on the warp. The Baby Wolf has wheels. As I wind the warp onto the back beam of the Compu-dobby tension is maintained and the Baby Wolf glides towards the Louet.

Improvised Warp Cross Holder
The second photo shows my warp cross holder. While warping from the front, which I rarely do, I realized a warp cross holder would be good to have at hand. I placed four bobbins in a box of short colored pencils. I inserted a pencil into the opening of each bobbin creating a secure place to hold a warp.

Lynn Yu used a dowel with over-the-door hooks but when the plastic hooks broke, the pair of metal wreath hangers were a good alternative. Also found the chin up bar, so that's the other easily removable option.
This is based on Laura Fry's method as described on her blog (she calls it a warping valet) and YouTube video - https://www.youtube.com/watch?v=HfoYVH-nRcA - as well as the Efficient Weaver book and DVD. I've used this for back-to-front warping and like Laura, have saved a couple sturdy bleach bottles that I fill with a cup or two of water, each, as weights to use with S-hooks. Beaming on is much quicker and cleaner for me, this way.
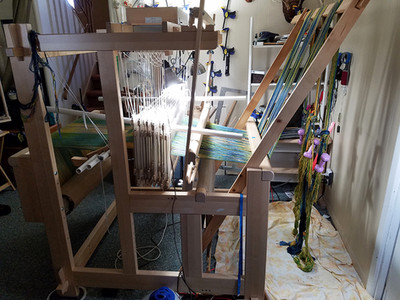
Hedy Lyles has been using some form of trapeze for quite a few years. As the years go by, my trapeze becomes more and more simple. At this point, I use two 2 x 4's that are 8 feet long. I cut a notch in the top and slide a shorter 2 x 4 into the slot, across the width. I used to clamp the uprights to the loom, but that really is not necessary and I just brace them inside the frame of the loom. They lean against the front breast beam and the lower cloth beam. I generally tie on to the previous warp in the front and then wind the warp, and knots, through the reed, heddles, lease sticks to tension (which are 3 white PVC pipes, not wood), and then over the back beam.
Above left photo shows the entire loom. The right photo shows the front of the loom with the trapeze braced inside the loom frame. Some people say they don't think they have room for a trapeze and this photo shows that I'm almost right up against the wall. You don't need a lot of space. The warp is weighted with 2 lb. hand weights.

This photo shows the path from the viewpoint of the back beam. The warp is going over, under, over the PVC pipes. The pipes are held by a homemade Angel Wings. The warp is weighted at the front of the loom, up against the wall. Instead of a raddle, Kathrin Weber teaches that all you have to do is put 2 clamps on the back beam to keep the warp from spreading outside of the width of the warp.
Carol Steuer made a trapeze out of two 1"x4"x8' boards, a metal closet rod and four steel utility hooks. I cut the bottom of the boards at an angle so the trapeze rests evenly on the floor and against the front beam. It is held in place with clamps.
I always wind my warps in bouts of about 100 ends and weight each bout with a one-pound hand weight on S-hooks.
The warp path from the trapeze is under the front beam, over the raddle on the race, through the lease sticks and onto the back beam. When I'm about halfway done, I can carefully lift the closet rod down to the lower hooks and complete the process.


